Wednesday, November 16, 2011

Wooo Doggies!

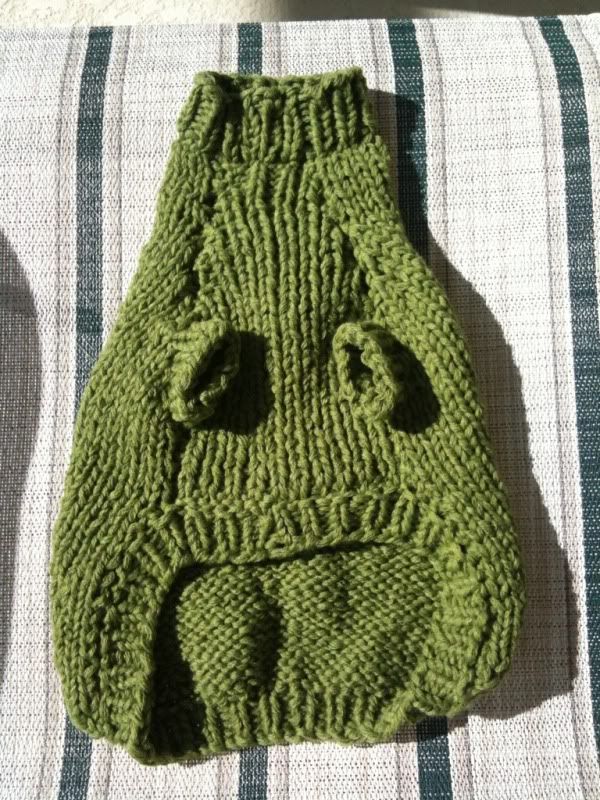
Roscoe is a super model
  Doggie sweater to be exact. I wanted to thank a friend of mine for hosting me by making her new dog a sweater to protect him from the very mild cool winter of Florida and the harshness of real winter when they traveled up north. I used the smallest size on the pattern and it was a perfect fit!

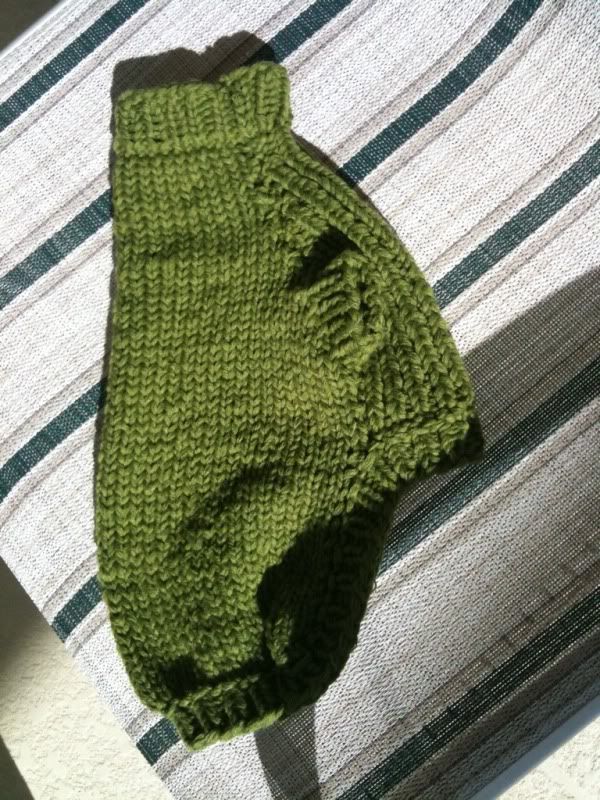
  I got this pattern a while ago because it has a cute Yorkie on it. My roommate at the time had 3 of them and so every Yorkie thing I saw I got lol. The pattern is provided free by Caron and is called Rainbow Pooch Sweater. Overall it was an easy knit, but I wish it was done in the round...something to think about if I ever make another.

  The yarn I used is actually the FIRST project using the large amount of recycled yarn I harvested from my old Wet Seal Duster which I blogged about a while ago. I held two strands together and still didn't even make a dent in the stash, lol. 


Summerflies


  Well I worked on this, my first shawl, all summer and finished it just in time for fall. Don't get me wrong, it wasn't a hard pattern or anything, it just took longer and longer to do each row the further you went along. By the end there's almost 400 stitches! WHOA!

  Anyway, in general I'm not really a fan of shawls, but this one had a great pattern written row by row and that kept things interesting. Also, I used a worsted weight yarn so mine came out a little bigger and more substantial. Plus it works as a cowl too, which is more my style.

  Want to try this pattern for yourself? Great! It's FREE! You can get it at Holly and Ella Knits or on Ravelry of course. The yarn I used was Berroco Remix™in a sort of off white. 

Sunday, November 6, 2011

My First Socks - Peds!

  This project actually had a couple of firsts for me. First pair of socks AND first time using self striping yarn. Loooove the self striping yarn. Love.

  The pattern is called Pom Pom Peds by The Purl Bee and it's a great pattern. Lots of pictures and well written directions. I didn't have any problems with it and, again, these were my first pair of socks. They're worked from the top down.

  The yarn I used is from Knit Picks called Felici Fingering Self Striping Sock Yarn in the Afternoon colorway.


Here's a few things I learned in the process of making these...

  • When using self striping yarn DON’T use the first color, it probably isn’t the full length! DAMN!!

  • If you have a 10” foot you wont have enough of this yarn to do them both the same with one skein. If you don’t care about the order of the stripes then you’ll have enough of it and don’t worry! Have fun. I was seriously 1 and 1/2 stripes short. GAH! Luckily I saved the yarn I had to scrap because it wasn’t the correct color for the next sock and finished it with that.

  • I am not good at picking up stitches. Bleh, need to work on that, mine were a little holey and weird.

  • Lastly, I think I might try a size smaller needle for the next pair and add on an extra 4 stitches like Haramis did with hers.

Saturday, November 5, 2011

Clear Project Bag


  I believe the idea of this had been planted in my head for a couple days. How? Well, I recently discovered the Knit Picks Podcast and have started listening to them from the beginning while on my walks/runs everyday. Granted, they're rather outdate since the first one was back in 2007 but they're still interesting and make my runs more entertaining and I always learn a little something.


  So, where does that come in? Well, one of the episodes talked about their clear plastic project bags. They said they found that when knitting in public places the clear bags allowed people to see what's going on and more people an usual could come up an ask either what they're doing or what they're working on.


  I thought this was great and thought maybe instead of inspiring others to ask about what's going on with what I'm knitting that maybe the clear bag would inspire ME to work on my sweater project more. It's been stored in a box when I wasn't working on it and at school, but now that I'm home and have time I feel like it's time to finish. IT'S TIME!!!


  Thus this bag was born out of materials I already had. A last minute project before bed so I could use it the next day. I should have stored the plastic better...it was wrinkly from being mashed into my fabric bin. Oops! For future reference....store un-ironable fabric on rolls as not to wrinkle.


Want to make your own? You NEED...


- Clear or frosted (like mine) fabric 
   - 22" wide x 26" long


- 1/2"-1" wide bias tape (I had 1" on hand)
  - 21" long for around the top
  - 18" long (CUT 2) for handles


Here's HOW:


- Fold the long side (26") of the plastic in half. Sew up the sides leaving the top open. 1/2" seam allowance.


- To make the gusset, pinch the 2 bottom corners and sew a 6" long seam. Trim the corner to 1/2" within the seam.
  - For more info and pictures for this step please refer to the purl bee's tutorial on an easy drawstring bag and go down to the "Make Gusset" section.


- Turn bag inside out.


- Pin bias tape around the top of the bag. Sew in place.


- Pin your handles on the inside of the bag. I measured one side of the bag and placed them 5 1/4" in on each side from the side seam. It was 1/4 of the total measurement of one side of the bag.


- Now I zig-zag stitched the handle's raw end to the bag. This will stop it from fraying. Then I went back and straight stitched the handle up closer to the top of the bag to stabilize.


DONE! It took me like 10 minutes total I think and only because I thought of using ribbon instead of bias tape at first lol. Much easier with the bias tape!


*One NOTE...I didn't line this bag because 1) it wouldn't be as see-through and 2) plastic doesn't fray! The thing about plastic is that it wont last forever. You could bind the edges in bias tape to make it look pretty but the more you stitch the plastic the more it will perforate and weaken the fabric. Plus I really don't think you'll even notice that it's 'raw edged'. If anything...if you really feel it needs 'finishing' I would heat set the seams. Turn your iron onto medium/medium-high and heat seal the seams together.